Smart Life App Installation Guide
Below is a complete guide to installing the Smart Life app on your devices.
If you haven’t bought this product then you may buy it from Amazon by visiting their website. Please click Smart Bulb. Otherwise, continue to read the instructions:
Step 1: Navigate to the app store on your mobile device.
Step 2: Download an app called “Smart Life”.
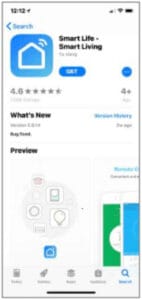
Step 3: Once the app is downloaded, open it and select “Register”.

Step 4: The app should automatically detect your country code. If not, please select the country code. If not, please select the country code for your country of residence.
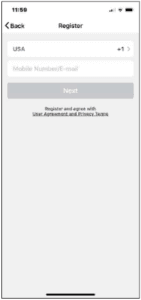
Step 5: Enter either your email address or phone number. (If you enter your phone number you will be sent a verification text message which you will need in the next step).
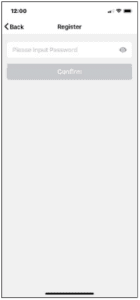
Step 6: If you’re setting up using a phone number, please enter the verification code that was sent to your phone and your desired password, then select “Confirm”.

Step 7: If you’re setting up using an email address please enter your desired password, and select “Confirm”.
Step 8: You have now successfully created an account and you’re now ready to start setting up your Smart bulbs and fixtures.
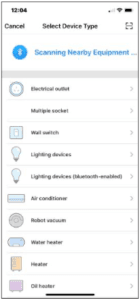
Step 9: Select the Plus (+) in the top right corner to add a device.

Step 10: Select “Lighting Devices”
Step 11: Connect your Smart light to a power source. To enter pairing mode, turn the Smart light on and then off for 3-5 seconds at a time. Do this 3 times. The Smart light will begin blinking rapidly once in pairing mode.

Step 12: Connect to your desired Wi-Fi network, enter your password, then select “Confirm”.
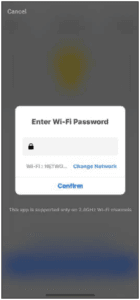
Step 13: If a blue box appears at the top of the screen, it means you’re currently not connected to a Wi-Fi network.

Step 14: Once you select “Confirm” after entering your password, the app will start to pair the Smart light to your app.

Step 15: If you get a message that says “Failed to Add” it means that the connection has failed. You may have to enter the Smart light into pairing mode again and repeat steps 11 through 14.

Step 16: Once your smart light successfully connects to the app, the below screen will pop up and you can change the name of your Smart light/device.
For Example: 16 Fixture. It’s best to make this simple so that if you would like to connect this to your Alexa App or Google Home, it will be easier for the smart assistant to understand which light you would like to control.
After naming your Smart light, select “Done”.

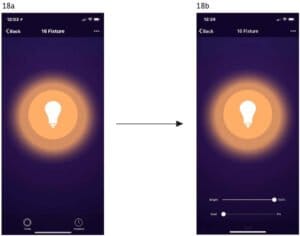
Step 17: You’re now able to control your Smart light in the Smart Life app.

Step 18: Select the circle that says “White” (this may be different for your device). This will allow you to change the color and brightness of your lighting device.
Step 19: Select the circle that says “Schedule”. This will allow you to schedule your lighting device to turn on or off at certain times of the day. Select “Add Schedule” at the bottom of the screen to get started.
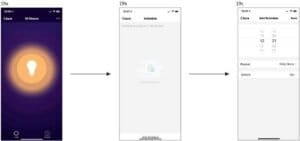
Step 20: On the “Devices” screen you can turn on/off all the lights, you will be able to change the color, or warmness, and adjust the brightness depending on the light selected.

Step 21: Select “Scenes” at the bottom of the screen to create a Scene. For example: You can create a scene to have your lights turn on when you arrive home or have them turn off when you leave your home.

Step 22: Select “Profile”. In your profile, you can create scenes, share devices, send feedback, and more. Your smart light is now set up and ready to use in the Smart Life app.
